 how-to
Minimally Invasive Dental Implant Procedures Explained
Table of Contents
- What Are Minimally Invasive Dental Implant Procedures?
- Benefits of Flapless Dental Implant Surgery
- Mini Dental Implants vs Standard Implants
- Step-by-Step: What to Expect During Your Procedure
- Dental Implant Recovery Timeline and Aftercare
- Who Is a Candidate? Candidacy and Contraindications
- Cost Considerations and Long-Term Maintenance
- Conclusion: Choosing the Right Implant Approach
- Frequently Asked Questions
Last Updated: September 9, 2026
What Are Minimally Invasive Dental Implant Procedures?
Minimally invasive dental implant procedures are techniques that place implant fixtures with reduced surgical trauma, often avoiding traditional incisions and sutures. These approaches prioritize preserving healthy gum tissue and bone while still achieving strong, long-lasting results. These methods can reduce chairside time and improve patient comfort, especially for those with dental anxiety.
The core distinction lies in how the dentist accesses the jawbone. Instead of cutting and lifting a flap of gum tissue to expose the bone, minimally invasive methods often use a "soft tissue punch" or flapless surgery. This means the gum is barely disturbed, which directly translates to less bleeding, a lower risk of swelling, and a more comfortable post-operative recovery period.
The most significant advantage is the preservation of blood supply to the bone and gums. When tissues remain intact, the body heals faster and the implant integrates more predictably, meaning less time off work and a quicker return to normal eating.
Benefits of Flapless Dental Implant Surgery
The primary benefit of flapless dental implant surgery is the dramatic reduction in surgical trauma. When a dentist uses a direct drill technique through the gum tissue rather than reflecting a flap, the body's inflammatory response is minimized. This usually results in less pain, minimal swelling, and a significantly shorter healing period.
A common approach is 3D-guided surgery. Using cone beam computed tomography (CBCT) scans, we create a digital map of your jaw, allowing virtual implant placement before we begin and ensuring surgical precision without wide-open visualization.
This precision matters for several reasons:
- Reduced bleeding: Because there are no large incisions, there is less intraoperative bleeding.
- Preserved bone density: Keeping the periosteum intact helps maintain the blood supply, which is critical for long-term implant stability.
- Faster healing: Without sutures to remove, the soft tissue management is simpler, and patients often find they need less post-operative pain medication.
Mini Dental Implants vs Standard Implants
Choosing between mini dental implants vs standard implants depends on the quality of your bone and the forces your new teeth must withstand. Mini implants, which have a smaller implant diameter, are often used to stabilize lower dentures or in areas with limited space. They are less invasive to place and may be an option when bone grafting is not desired.
However, standard implants remain the gold standard for replacing individual teeth or supporting full arches. They are wider, which offers a larger surface area for osseointegration (the process where bone fuses to the implant). This makes them more strong for the heavy forces of chewing, particularly for molars.
| Implant Type | Diameter | Best Use Case | Key Advantage |
|---|---|---|---|
| Mini Implants | Smaller | Stabilizing dentures, narrow gaps | Less invasive, often no grafting needed |
| Standard Implants | Wider | Single tooth replacement, full arches | Superior strength and longevity |
Step-by-Step: What to Expect During Your Procedure
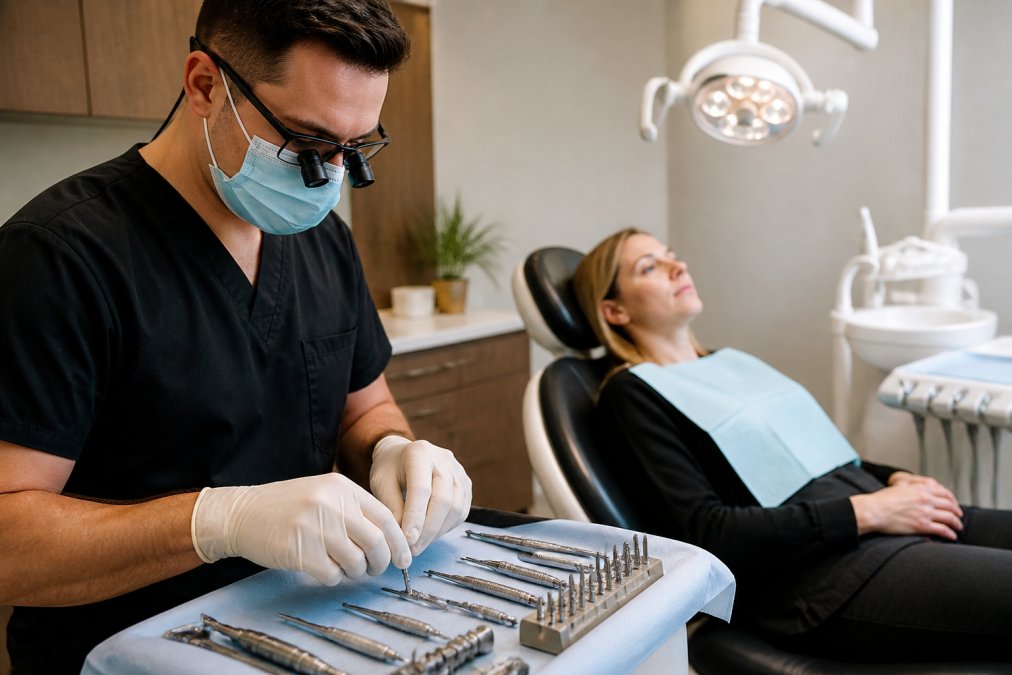
Knowing what each phase feels like, not just what it is called, is the best way to lower anxiety. Here is a walkthrough of a typical flapless, guided procedure.
Phase 1: The Digital Workup (Before You Arrive)
Your procedure begins days earlier. A CBCT scan generates a 3D model of your jaw, loaded into implant planning software. On that model, your dentist maps the exact implant diameter, length, and trajectory, avoiding the inferior alveolar nerve and maxillary sinus. This is a surgical blueprint with tolerances measured in fractions of a millimeter. Many practices use a printed or milled surgical guide, a plastic stent fitting over adjacent teeth, to transfer that plan to your mouth.
Phase 2: Numbing and Sedation (10-15 Minutes)
After a local anesthetic like lidocaine or articaine is administered, your dentist waits several minutes to confirm profound numbness. If you have dental anxiety, oral sedation (like triazolam) or nitrous oxide takes effect now. You should feel no pressure beyond mild vibration during drilling; if you feel sharp pain, say so, more anesthetic can always be given.
Phase 3: Site Access via Soft Tissue Punch (2-3 Minutes)
Instead of a scalpel and sutures, a circular punch, typically 3 to 4 millimeters in diameter, is used to remove a small plug of gum tissue directly over the implant site. You may feel a slight pinching sensation as the punch rotates. This step exposes the crest of the bone without reflecting a flap, which preserves the periosteum (the blood-rich membrane covering the bone) and its critical blood supply.
Phase 4: Osteotomy Preparation (5-10 Minutes)
This is the most technically demanding step. A sequence of drills of increasing diameter prepares the bone socket, run at low speed with copious sterile saline irrigation to prevent heat necrosis, bone dies at about 47°C (117°F), and overheating is a leading cause of early implant failure. You will hear a high-pitched whine and feel gentle vibration, but not heat. The surgical guide keeps the drills aligned with the planned trajectory.
Phase 5: Implant Insertion (2-5 Minutes)
The implant, a sterile titanium or titanium-alloy screw, is threaded into the prepared site using a handpiece or torque wrench. You will feel pressure as the threads engage the bone. The goal is primary stability, measured in Newton-centimeters (Ncm); a value above 35 Ncm generally allows immediate or early loading, while lower values may require longer healing before the crown is attached.
Phase 6: Healing Abutment or Immediate Restoration (5-10 Minutes)
Depending on your case, a healing abutment (a small collar that shapes the gum during healing) is screwed onto the implant, or a temporary crown is placed. If a same-day crown is planned, an intraoral scanner captures the implant position and a milling machine fabricates the restoration while you wait. The surgical portion is often complete in under 45 minutes.
After the procedure, you will receive post-operative instructions and a follow-up appointment, typically 7 to 10 days later, to check healing and remove any non-dissolving sutures if used.
Dental Implant Recovery Timeline and Aftercare
The dental implant recovery timeline for minimally invasive procedures is generally shorter than for traditional surgery. Most patients experience peak discomfort within the first 48 hours, which is usually managed with over-the-counter pain relievers. Swelling typically subsides within three to five days.
Pain management beyond local anesthesia is straightforward but critical. General recommendations include:
- Ice packs applied to the cheek for the first 12 hours to minimize swelling.
- Soft food diets for the first week to protect the surgical site.
- Saltwater rinses starting 24 hours after surgery to keep the area clean without disturbing the clot.
Most patients return to desk jobs within 24 to 48 hours. Strenuous exercise should be avoided for about a week to prevent a blood-pressure spike that could cause bleeding. Gum tissue closes around the implant quickly, but the bone continues to integrate over the following months.
Who Is a Candidate? Candidacy and Contraindications
While minimally invasive techniques are excellent, they are not suitable for everyone. The primary prerequisite is sufficient alveolar bone height and width to house the implant safely. If bone has resorbed significantly, a flapless approach may be risky because the dentist cannot visualize the jaw contours directly.
Detailed contraindications include:
- Active infection at the site.
- Severe bone loss where the nerve canals are at risk.
- Uncontrolled systemic conditions that impair healing, such as severe diabetes or immune disorders.
- Bruxism (teeth grinding) that is unmanaged, as this can overload the implant during the healing phase.
A qualified professional must assess your bone density and medical history. If you have been missing teeth for years, your jaw may have changed, and grafting or a different approach may be needed to ensure optimal implant placement.
Cost Considerations and Long-Term Maintenance
The cost of minimally invasive dental implant procedures is not a single number, it is a bundle of distinct fees that vary by geography, provider, and case complexity. Understanding the line items helps you compare quotes. A typical breakdown includes:
- Surgical fee: Covers the CBCT scan, the surgical guide fabrication, the placement procedure itself, and the implant fixture. This is often the largest single component.
- Abutment and crown fee: The prosthetic components, the connector piece and the visible ceramic crown, are billed separately from the surgical fee.
- Anesthesia or sedation fee: If you opt for oral sedation or nitrous oxide, this is an additional charge.
- Bone grafting or sinus lift fee: If your bone volume is deficient, this can add significant cost and time.
Many dental insurance plans classify implants as a major restorative procedure, covering part of the crown but often excluding the implant fixture. FSAs and HSAs can pay for these procedures with pre-tax dollars. Some practices offer third-party financing through companies like CareCredit, which provides interest-free promotional periods.
Long-Term Maintenance: The Protocol That Keeps Implants Alive
The surgery is only the beginning. The real determinant of a 20-year implant lifespan is the daily hygiene routine and professional recall schedule you follow afterward. Implants are vulnerable to peri-implantitis, the leading cause of late implant failure. Unlike natural teeth, implants have no periodontal ligament to send early pain signals, by the time you feel discomfort, significant bone loss may have occurred.
General protocols recommended by implantologists include:
- Daily home care: Use a soft-bristled or implant-specific brush. For the area under a bridge or around a single crown, standard string floss is often insufficient. Use superfloss (which has a stiff end for threading) or a water flosser set to a low-to-medium pressure to flush debris from the sulcus, the tiny crevice between the gum and the implant.
- Interdental brushes: For wider gaps, a rubber-tipped or conical interdental brush (like a Proxabrush) is more effective than floss at removing biofilm from the implant surface.
- Avoid abrasive toothpaste: Titanium is scratchable. Highly abrasive toothpastes can roughen the implant collar, creating a surface where bacteria adhere more easily. Choose a low-abrasive toothpaste or one specifically formulated for implants.
- Professional recall schedule: Most implant specialists recommend a professional cleaning every 3 to 4 months for the first year, then every 6 months if your tissue health is stable. These visits are not just cleanings; they include a periodontal probe check to measure pocket depths and often a radiograph to assess bone levels around the implant.
- Watch for warning signs: Redness, swelling, bleeding on brushing, or a change in the fit of your crown are all reasons to schedule an immediate evaluation. Do not wait for your next routine visit.
With this level of care, the titanium implant root is designed to last a lifetime. The ceramic crown, however, is subject to normal wear and may need replacement after 10 to 15 years. That is a routine prosthetic procedure, not a surgical one.
Conclusion: Choosing the Right Implant Approach
Choosing between minimally invasive and traditional techniques is best done with a specialist who understands implant biomechanics. The goal is not just to place a screw, but to ensure a screw-retained or cemented restoration that functions and looks natural for a lifetime.
The right approach depends entirely on your anatomy and your long-term goals. Whether you are edentulous and seeking a fixed solution or missing a single tooth, a consultation with a board-certified implantologist is the only way to determine the safest path forward.
Frequently Asked Questions
What is the downside of mini dental implants?
Mini dental implants use a smaller diameter than standard implants, which can mean less initial stability in areas that need to withstand heavy chewing forces. They are often suited for stabilizing lower dentures or smaller gaps. Your dentist will assess your bone density and the location of the missing tooth to determine if a mini implant will provide adequate long-term support or if a standard implant is the more durable choice.
How does the recovery time for minimally invasive implants compare to traditional surgery?
Because flapless and minimally invasive procedures avoid large incisions and sutures, many patients experience less swelling and discomfort. While the full dental implant recovery timeline still requires several months for osseointegration, the initial post-operative recovery is often shorter, with many people returning to normal activities within a day or two, compared to several days of downtime after traditional surgery.
Are there specific candidacy requirements for minimally invasive dental implants?
Good candidates generally have adequate bone height and width and healthy gums. The flapless technique relies on having enough tissue to work through a small punch, so significant bone loss or very thin gums may rule it out. A cone beam CT scan is essential to evaluate your bone density and confirm you qualify for a conservative placement approach.
How do board-certified implantologists ensure precision during minimally invasive procedures?
Board-certified implantologists may use 3D-guided surgery, which relies on cone beam computed tomography (CBCT) imaging to plan the exact position of the implant before the procedure begins. A surgical guide is then used during placement. This technology can help avoid vital structures like nerves and sinuses, improve implant stability, and reduce chairside time and surgical trauma.
At Trinity Dental Arts, we combine clinical expertise with modern technology to offer these advanced procedures. Led by a board-certified implantologist, our practice focuses on conservative placement techniques to maximize your comfort and outcomes. With our in-house lab and same-day full-arch teeth capabilities, we can often provide you with a fixed smile faster than you might expect. Get started with Trinity Dental Arts and restore your oral well-being with a gentle, precise approach.